On this page
- The mental switch that has to happen first
- Threat ranking: distance to the objective, not to you
- Repair economics
- Multi-point defence and routing
- Reading a wave before it arrives
- When to accept a loss
- The arithmetic behind repair versus attack
- Reading the board in defense games
- The four defense archetypes on this site
- Multi-point routing in practice
- Deliberate sacrifice
- Worked example: holding the depot
The mental switch that has to happen first
New defense players lose their first several rounds at full health. They were never touched, they killed plenty of zombies, and the objective fell anyway. This is not bad luck — it is the genre working exactly as designed.
In every other category, the thing that must survive is you. In defense, it is not. Your health matters only because being alive lets you keep defending, and the moment you start optimising for your own safety instead of the objective's, you are playing a different game from the one in front of you.
Your health bar is a budget for staying in position. The objective's health bar is the score.
Threat ranking: distance to the objective, not to you
The core skill is ranking. Every zombie on screen has a time-to-objective, and your job is to spend your limited attack throughput on whichever has the smallest one.
This produces decisions that feel wrong. A brute standing next to you may be entirely safe to ignore if it still has a barricade between it and the objective, while a runner across the map on a clear lane is an emergency. Learning to make that call reliably is most of what separates a wave-four defender from a wave-fifteen one.
- Anything with a clear path to the objective — highest priority regardless of distance.
- Anything currently damaging the objective — second, and only second, because damage already done cannot be undone.
- Fast enemies not yet on a clear path — third; they become priority one quickly.
- Slow enemies with obstacles ahead of them — last, always.
Repair economics
Repairing is the most over-used action in the genre, because it feels productive and safe. It is neither, most of the time.
The arithmetic is straightforward. Repairing restores a fixed amount of objective health per second. Attacking prevents an amount of damage per second equal to the damage output of whatever you would have killed. In almost every situation with active attackers, the second number is larger — often several times larger, since one zombie killed prevents all its future damage rather than a single tick.
- Never repair while enemies are actively attacking. You are refilling a bucket with a hole in it.
- Repair during breathers only, and only below roughly 60% integrity.
- Repair the thing that will be attacked next, not the thing with the lowest current value.
- Accept partial repairs. Going from 60% to 80% and moving on beats going to 100% and arriving late somewhere else.
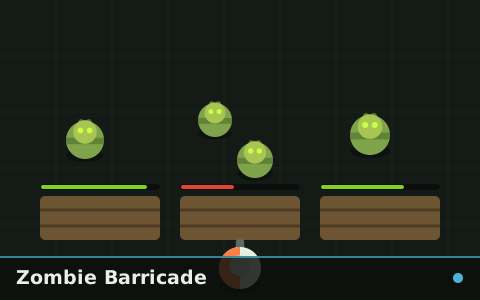
In Zombie Barricade repair resources are deliberately insufficient. That is a design statement: you are meant to choose a section to sacrifice, not to keep everything intact.
Multi-point defence and routing
Games with several entry points — Safe House Defense most explicitly — convert the problem from ranking into routing. You cannot be at two places at once, so the question becomes what order to visit them in.
The winning approach is almost always a fixed circuit rather than reactive movement. A circuit means you arrive at each point on a predictable schedule, which lets you do partial work everywhere instead of full work in one place and none elsewhere. Reactive movement feels responsive and produces exactly the failure mode it is trying to avoid: you are always arriving at the last emergency while the next one develops unwatched.
- Build a circuit that matches travel times. Adjacent points should be visited together; distant ones get their own slot.
- Do partial work at each stop. 80% then move.
- Break the circuit only for an actual breach risk, then rejoin it at the nearest point rather than restarting.
- Check the far point on a schedule, not when you remember it.
Reading a wave before it arrives
Defense games telegraph more than players notice. Spawn positions are visible a second or two before enemies become threatening, and that second is enough to reposition rather than react.
| Signal | Meaning | Action |
|---|---|---|
| Spawn on two opposite sides | Split attention wave | Take the centre position early |
| Spawn concentrated on one side | Volume wave | Commit fully; the other side is a feint |
| Brutes leading the wave | Attrition wave | Let them come; kill the runners behind |
| Very short breather | Pace wave | Skip repairs entirely this round |
The habit worth building is looking at where enemies appear rather than where they currently are. Appearance tells you what the wave will demand; current position only tells you what it is doing now.
When to accept a loss
One of the most valuable defensive skills is deliberately conceding something. A barricade section, a lane, an entry point — sometimes the right play is to stop defending it and reallocate everything to what remains.
Players resist this because a conceded section feels like a failure, and because the loss is visible while the gain is not. But spreading resources evenly across four failing points produces four failures; concentrating them on two produces two solid holds and two problems you have already planned around.
The signal is arithmetic: if a point cannot be brought back above roughly 50% with the resources you have before the next wave, it is not going to survive the wave either. Stop spending on it and start planning for the breach.
The arithmetic behind repair versus attack
The rule 'kill first, repair later' is stated everywhere. Here is why it is true, with numbers, because seeing the size of the gap changes how readily people follow it.
Take a typical defense situation: three walkers attacking an objective, each dealing about ten damage per second. Repairing restores roughly sixteen per second.
- Repairing. Net change is +16 − 30 = −14 per second. The objective is still losing health while you work.
- Killing. Each kill removes ten damage per second permanently. Killing all three takes a few seconds and returns the net rate to zero.
- After ten seconds of repairing: the objective is 140 worse off and the three attackers are still there.
- After ten seconds of killing: the objective took some damage during the kills and is now stable.
The gap is not marginal, and it gets worse as attacker count rises. Repair is damage control for after the threat is gone, not a way of dealing with the threat.
Killing an attacker prevents all of its future damage. Repairing replaces one tick of it.
Reading the board in defense games
The mental model that works is a queue: every enemy has a time until it starts damaging the objective, and your job is to remove whatever is at the front of that queue.
That is not the same as the nearest enemy, and it is frequently not the enemy you are looking at. Three things change an enemy's position in the queue:
- Speed. A runner at forty metres beats a walker at twenty.
- Obstacles. An enemy that must chew through a barricade first is much further back in the queue than its distance suggests.
- Your own position. If you are standing between an enemy and the objective, it will engage you instead — which moves it out of the queue at the cost of your health.
That third point is the one experienced defenders exploit. Body-blocking is expensive but it is a real tool, and in an emergency it buys the two seconds needed to clear a lane.
The four defense archetypes on this site
Each of our defense games isolates a different aspect of the genre, which makes them a useful progression rather than four variations on a theme.
| Game | What it isolates | Learn it for |
|---|---|---|
| Zombie Defense | Threat ranking with full mobility | The core skill, in its simplest form |
| Zombie Barricade | Competing actions under a resource limit | Deciding what to sacrifice |
| Safe House Defense | Routing between multiple points | Building a circuit instead of reacting |
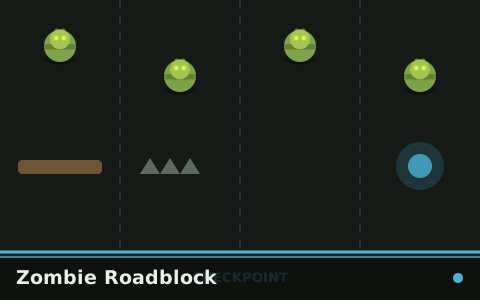
| Zombie Roadblock | Planning with no reflex pressure | Pure resource allocation |
Played in that order they build on each other: ranking, then triage under scarcity, then routing, then allocation. Playing them in the reverse order works far less well, because the later games assume the earlier skills.
Multi-point routing in practice
Safe House Defense is the clearest example of a problem that looks like reaction and is actually scheduling.
Four entry points, one of you, and travel between them costs real time. The instinct is to respond to whichever point is worst, which produces the classic failure: you are always arriving at the last emergency while the next one develops unwatched.
- Build a circuit. A fixed visiting order that matches travel times — adjacent points together, the distant one on its own slot.
- Do partial work everywhere. Eighty percent then move. The last twenty percent of a repair costs as much time as travelling to the next point.
- Break the circuit only for a genuine breach risk, then rejoin it at the nearest point rather than restarting from the beginning.
- Visit the far point on schedule, not when you remember it. Forgetting the far point is the single most common way that game ends.
A circuit feels slower than reacting and is measurably more effective, for the same reason a bus timetable moves more people than a taxi rank.
Deliberate sacrifice
The hardest thing to learn in the category is that some positions should be given up on purpose, and the arithmetic is straightforward once you look at it.
If a point cannot be brought back above roughly half integrity with the resources available before the next wave, it will not survive that wave either. Spending on it is throwing resources at an outcome you have already lost.
- Concede early, not late. A decision made in the breather is planning; the same decision made mid-wave is panic.
- Concentrate what you have. Two solid holds and two known problems beat four positions at forty percent.
- Plan for the breach. Know where you will stand and what you will shoot when the conceded point falls.
- Reassess after the wave. A conceded point is sometimes cheap to rebuild once the pressure is off.
Players resist this because the loss is visible and the gain is not. But spreading resources across four failing points produces four failures, and that outcome is just as visible thirty seconds later.
Worked example: holding the depot
Stage two of Ultimate Zombie Arcade is the most demanding defensive situation on the site, and walking through it shows the whole framework in one place.
- Arrive with supplies. The stage is decided before it starts. Supplies banked during stage one are your repairs and ammunition here, and arriving with none means playing the whole stage without the tools it assumes.
- Take a position with the depot behind you. Not beside it — behind. Zombies path to the depot, so anything that gets past you is already on it.
- Rank by clear lane, not distance. A runner on an open approach is the priority over a brute that still has to cross the whole field.
- Do not repair above 60%. Every second repairing is a second the attackers are unopposed, and killing them prevents all of their remaining damage.
- Convert supplies to ammunition, not repairs, by default. Ammunition prevents damage; repairs replace it. The exception is a genuine emergency below about a third integrity.
- Orbit tightly. The depot is the centre of your movement, not the arena. A wide orbit here leaves an arc uncovered for too long.
The failure mode is almost always the same: a player fights the stage like an arena shooter, wins every engagement, and loses the depot to the things they walked past. Being untouched at the end of a failed hold is the signature of the mistake.
If you lose stage two repeatedly, the problem is almost certainly stage one. Count your supplies as the stage transitions — under about six and the hold was lost before it began.
Key takeaways
- Rank threats by their time to the objective, not their distance to you.
- Killing an attacker prevents all its future damage; repairing only replaces one tick of it.
- Repair during breathers, below 60%, and only partially.
- Multi-point defence is a routing problem — build a circuit rather than reacting.
- Deliberately conceding a position beats spreading resources across four failing ones.
- Repairing under attack is net negative; killing an attacker removes all its future damage.
- Think of enemies as a queue ordered by time-to-objective, not by distance to you.
- Multi-point defence is scheduling, not reaction — build a circuit and do partial work everywhere.
- If a position cannot be restored above half before the next wave, concede it deliberately.
- The depot hold is decided in the previous stage; arriving with supplies matters more than playing the hold well.
Frequently asked questions
Why do I lose with full health in defense games?
Should I ever body-block zombies?
How do I know when to stop repairing?
Which defense game should I learn on?
How much health should I be willing to trade for position?
Which defense game teaches the most transferable skill?

Alex Morgan
Gaming Editor & Arcade Content Specialist
Alex Morgan is the editorial byline for everything published on Zombie Games Hub — game design notes, strategy guides and the tuning decisions behind all 30 arcade titles. More about our editorial byline.
Published · Last updated
Games mentioned in this guide

Zombie Defense
A generator in the middle of the map, zombies that want it more than they want you, and one of you.
Zombie Barricade
Three barricade sections, a hammer, a gun and never enough time to use both properly.

Safe House Defense
Four entry points, one of you, and a boarding action that takes exactly long enough to be a problem.
Zombie Roadblock
Zombies advance down four lanes toward a checkpoint. You have obstacles, a budget and no direct control.